MINIATURE PAINTING
Death Guard: Painting a Weathered Armor in Just a Few Simple Steps
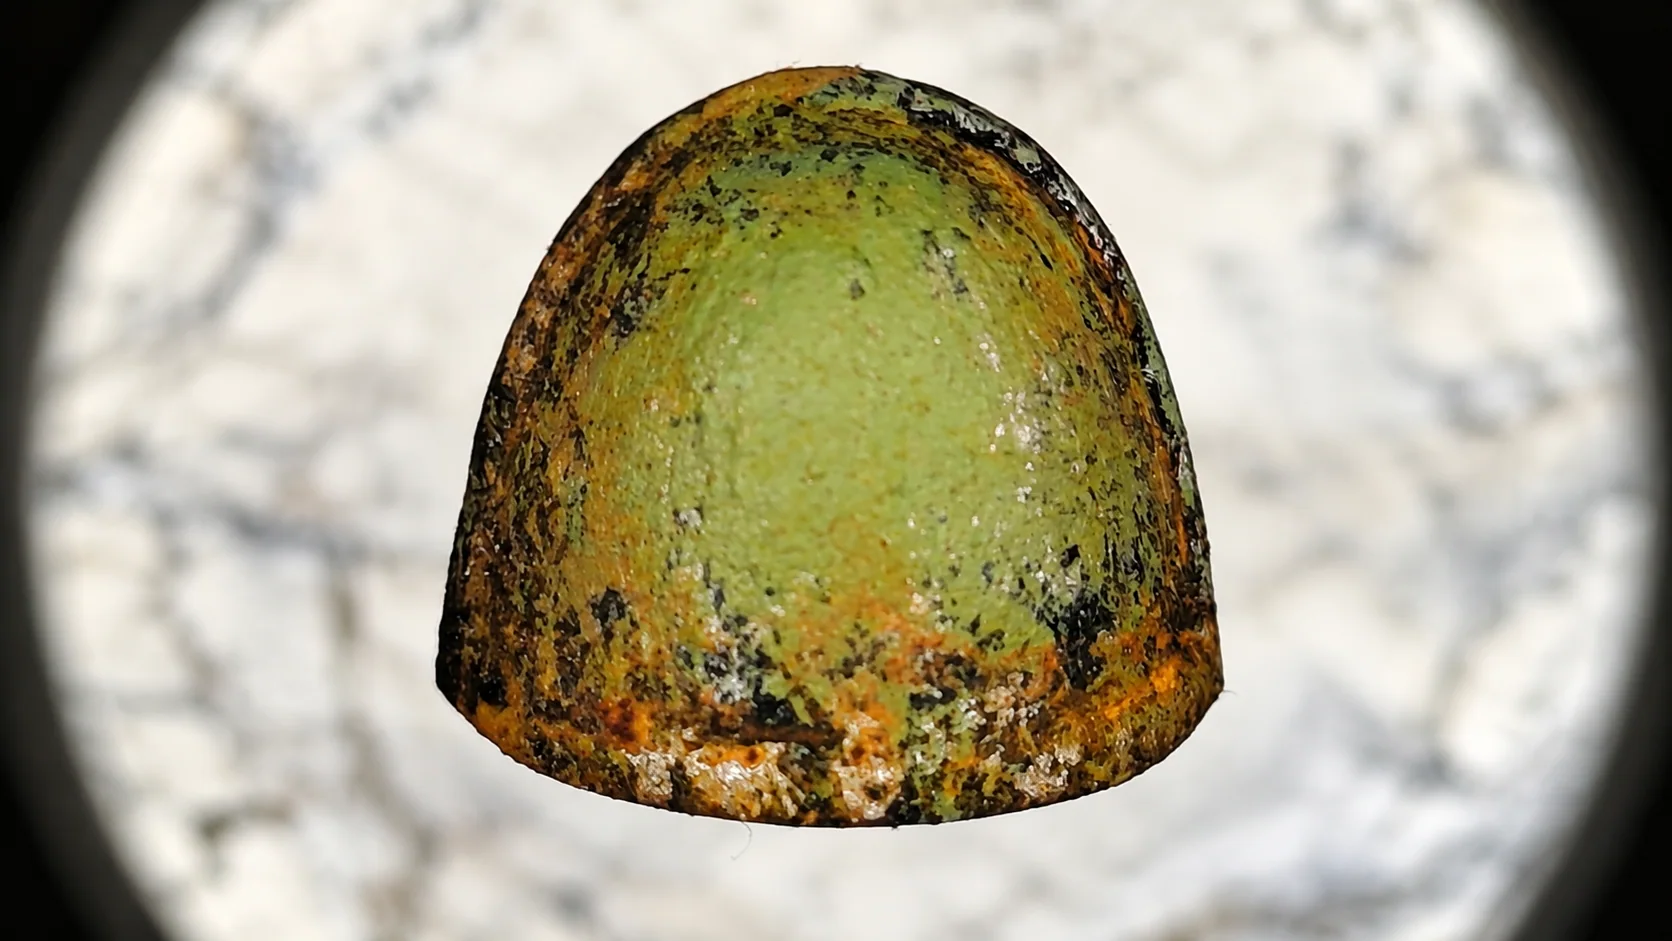
An Armor That Tells a Story
Today I want to show you a quick and simple technique to create armor that looks worn, rusty, and weathered by time.
For this tutorial, I've used a basic Space Marine-style shoulder pad, an ideal surface for showing how different colors interact and how we can layer them to create a convincing weathered effect.
The inspiration comes from the Death Guard, whose armor tells a story of centuries of battle through corrosion, deteriorating paint, and exposed metal.
But do we really need to paint every single scratch?
I don't think so!
Let's see how to achieve this effect in just a few steps.
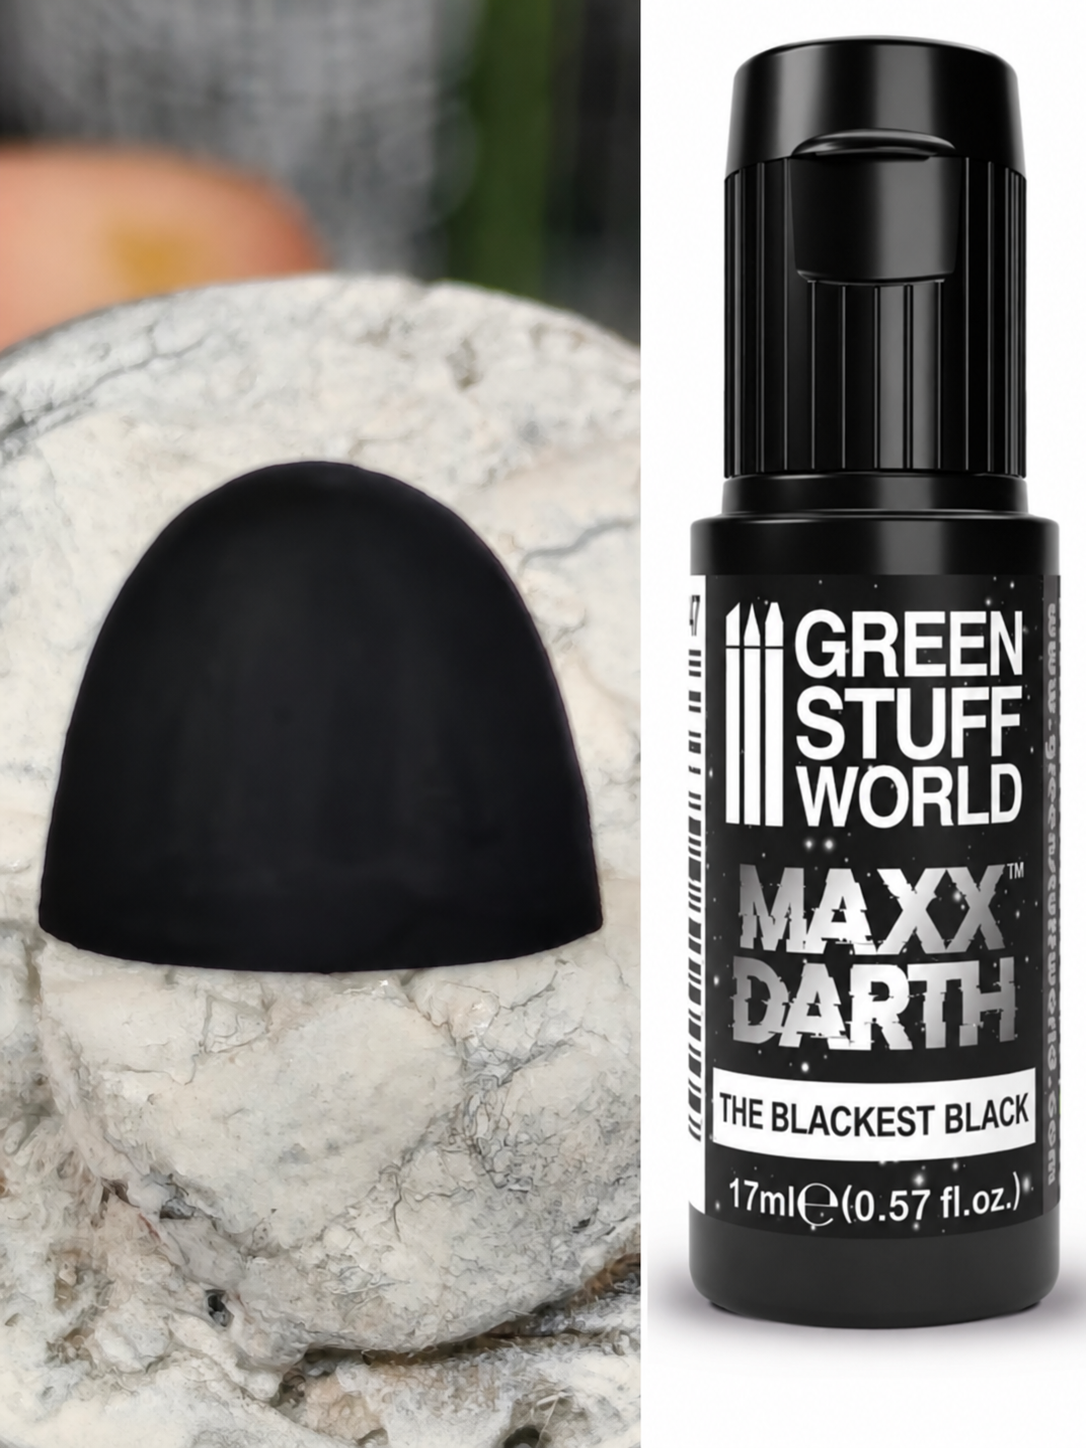
1. Starting With Black
I apply an ultra-matte black primer over the entire shoulder pad.
Black provides the foundation for our work and naturally preserves shadows in the deeper areas.
2. Bringing Out the Metal
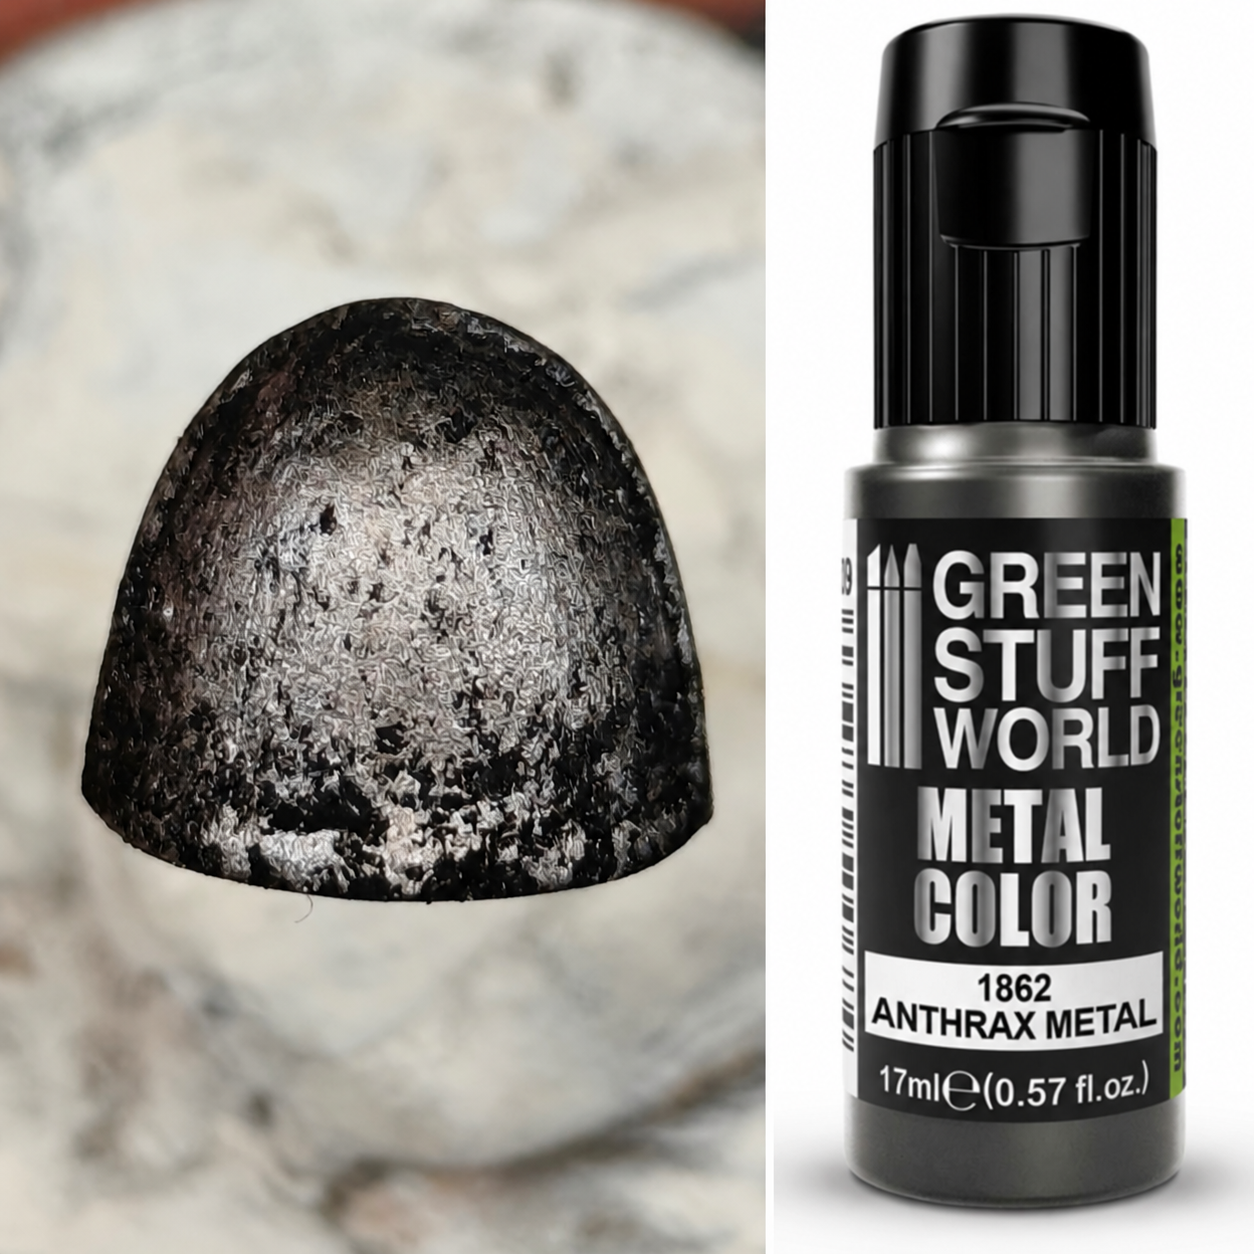
Now I grab a drybrush and some dark silver paint.
Instead of using the traditional drybrushing motion, I prefer gently stippling the paint onto the surface.
I'm not trying to achieve even coverage. I want some areas to remain black while others reveal the metal.
The result is an irregular surface, perfect for representing armor that has endured centuries of battle.
3. Adding the Green
Time for some green!
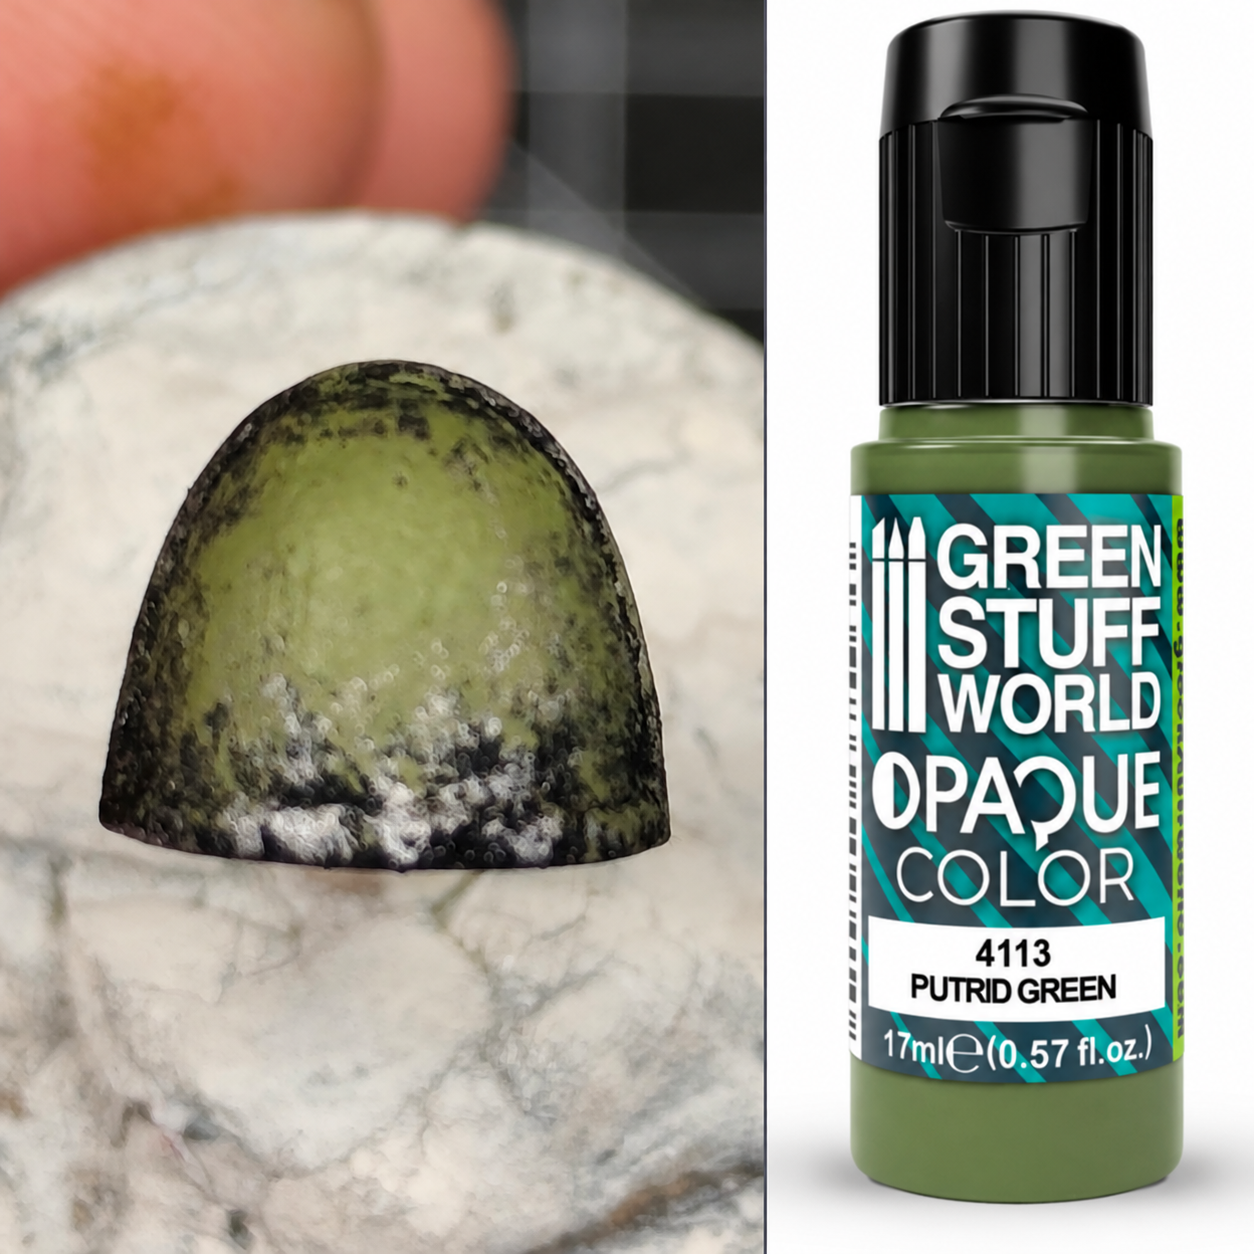
For this step, I've chosen Putrid Green , from Green Stuff World's Opaque Color range.
Using my drybrush again, I gently stipple the paint onto the shoulder pad.
This time, I concentrate mainly on the central area, trying to leave some of the metallic surface visible, especially around the edges.
This way, the green doesn't completely cover the dark silver underneath.
The result resembles paint that has gradually deteriorated over time, revealing the metal beneath.
A Little Tribute to the Dusk Raiders
My decision to layer green over dark silver isn't just about aesthetics.
It's also a slightly romantic interpretation, a small tribute to the Dusk Raiders, the name by which the Legion was known before becoming the Death Guard.
I'm not trying to faithfully recreate their original color scheme, but rather imagine that beneath this weathered armor, a trace of the past might still survive.
A small storytelling detail expressed through color.
And I'll soon dedicate an article to that story!
4. Time for Some Rust
So far, we've created a metallic surface covered with partially worn green paint.
But something is still missing!
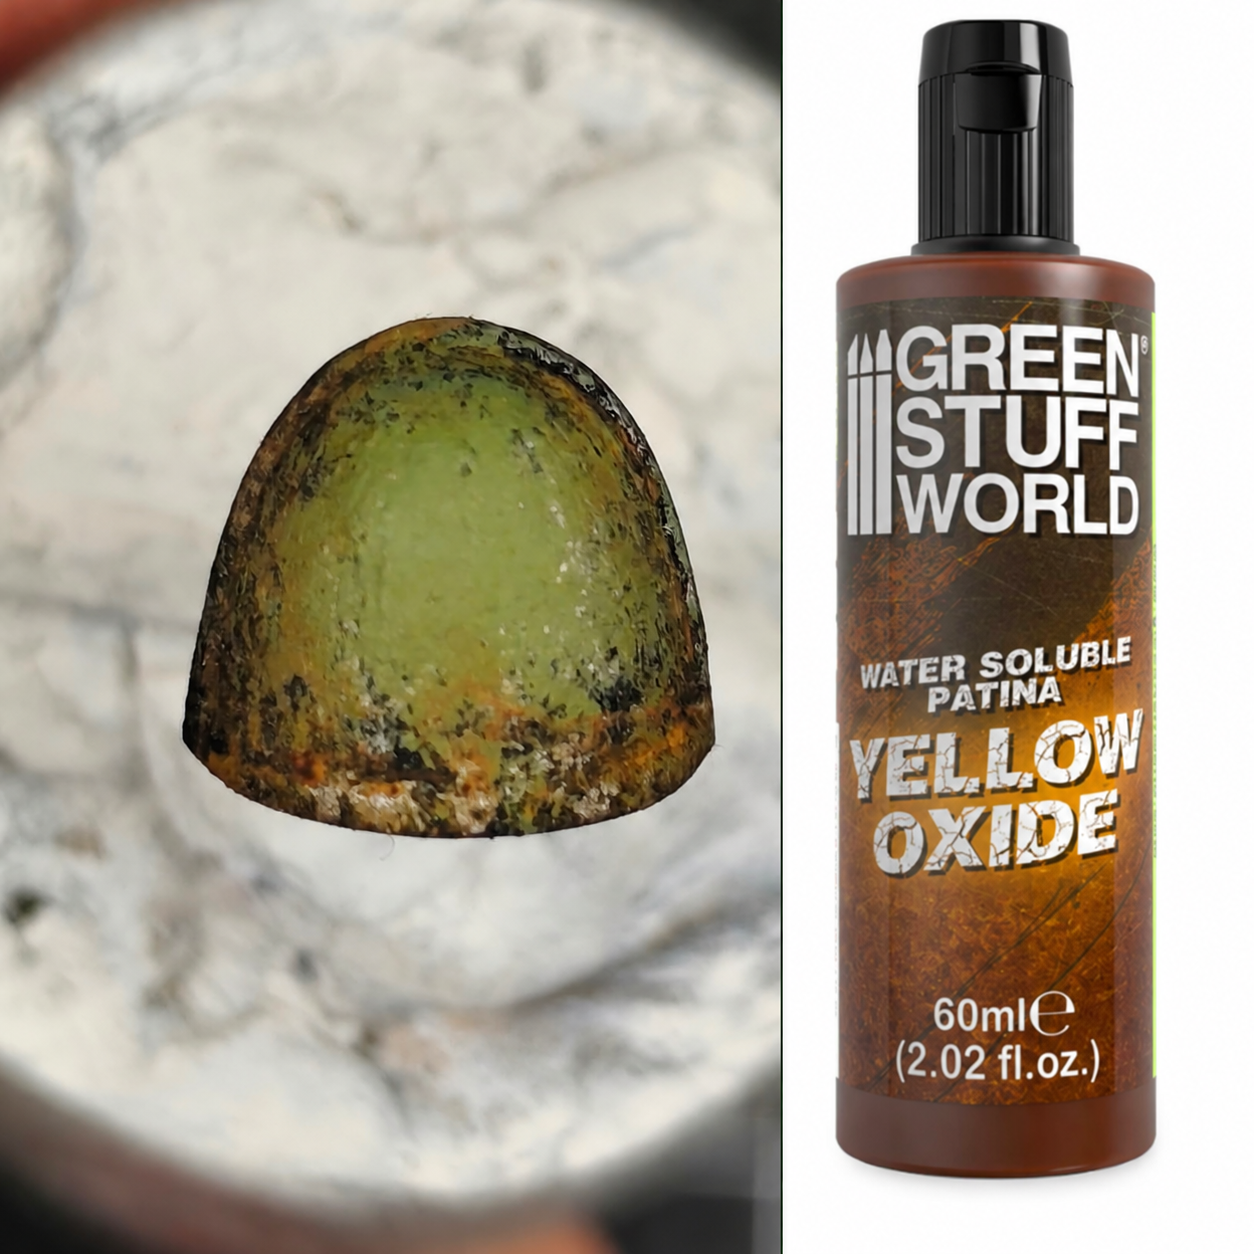
To add corrosion and rust, I use Water Soluble Patina Yellow Oxide by Green Stuff World.
I apply the product mainly around the edges of the shoulder pad, focusing on the areas where I want to simulate a greater accumulation of oxidation.
Then I gently drag some of the patina toward the center.
There's no need to be too precise.
In fact, the irregularities are exactly what makes this effect so interesting.
The warm tones of the patina also create a nice contrast against the cool, desaturated green of the armor.
5. Cleaning Up With Water
And now comes my favorite part!
One of the most interesting features of Water Soluble Patina is that it can be worked with water.
Using a slightly damp brush, I begin removing some of the patina from the more exposed surfaces.
This leaves most of the rust concentrated around the edges and in the areas where I want to preserve it, while the green paint and underlying metal begin to show through again in the center.
We can decide how much patina to remove, gradually controlling the level of corrosion.
It's a simple process, but one that produces some really interesting variations.
The Final Result
And there we have it!
With just a few colors and five simple steps, we've created a shoulder pad that looks worn, oxidized, and weathered by time.
No need to paint every scratch individually, and no need to use dozens of different paints.
Of course, this technique isn't limited to the Death Guard.
We can apply it to almost any kind of armor, simply changing the colors to suit our miniatures.
Personally, I really enjoy this approach because it allows me to create surfaces full of character without spending too much time on them.
And most importantly, it leaves plenty of room for experimentation!
Now It's Your Turn!
How do you create your weathered armor effects?
Do you prefer painting every little scratch, or do you use faster techniques?
Everyone is welcome to leave a comment below, and if you've tried this technique, you can also attach a photo of your results!
I'd really love to see your interpretations, compare the results, and maybe discover some interesting variations.
Products Used
At the bottom of this article, you'll find the complete list of products I used for this tutorial, along with links to purchase them.
A Quick Note About Affiliate Links
Some of the links in this article are affiliate links.
There's absolutely no extra cost to you: purchasing through these links won't increase the regular selling price.
It's a simple way to support Fantasy Fiber and help our project grow, allowing us to create more tutorials, videos, and free content.
Thank you all for your support!
Keep painting, keep creating!
Products featured in this article
MAXX DARTH BLACKGREENSTUFFWORLD
Explore ↗ANTHRAX METALGREENSTUFFWORLD
Explore ↗OPAQUE PUTRID GREENGREENSTUFFWORLD
Explore ↗WATER PATINA YELLOW OXIDEGREENSTUFFWORLD
Explore ↗Some links may be affiliate links. Purchases through them can support Fantasy Fiber at no extra cost to you.
Comments (1)
Che pennello hai utilizzato?
Ciao! ho utilizzato un pennello per Dry Brush di Greenstuffworld. Il numero 7
Leave a comment